
Log 18: It's Like a Junk Drawer in Here
- Bruce McCormack

- Jul 25, 2024
- 7 min read
Over the last couple of months I was battling some severe depression and overall lack of motivation. But I still got some random small bits of work done. Here's an overview of what I was working on:
Fixed the Jumping
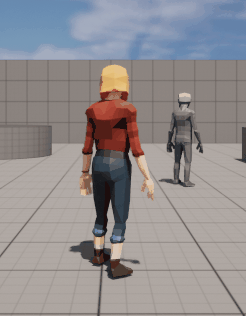
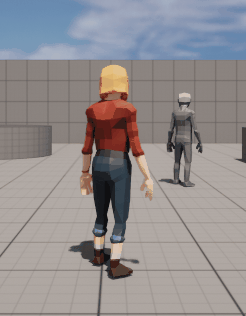
After tackling the bases, I decided to work on something relatively simple, something I knew would have a whole bunch of research and tutorials on it: jumping.
Specifically, what I was looking for was to have a normal jump while in civilian form, but being able to hold the button down for an extended jump after morphing. Turns out I was right: not only are there a bunch of tutorials on jumping, but Unreal has systems for this kind of thing in-built. I just needed to adjust the "Jump Max Hold Time" on the character when morphing.
I also doubled the gravity scale on the basic character, increased the max fall speed, and upped the jumping velocity. This keeps the characters able to jump to the height I want, but makes them feel a lot less floaty and more snappy with the quicker fall speed. I might want to undo this at a later point if I want to add more aerial combat than a couple hits but I'm not planning on it for now.


Changed Status Effect VFX
The next thing I worked on was making status effects more visually distinct and all-around more interesting by replacing my work with slightly modified Niagara systems that I purchased off of the asset store. It is really important for me that I keep all the colors and icons consistent to improve readability. I want players to be able to tell at a glance what they are affected by and how. For now, only the VFX for the items and morphing are fully implemented:


For the Overpower VFX at the end I added the explosion to really show that the buff ended.
For the debuffs that I eventually want to have, I modified a Niagara system into a sort of "proof of concept" for a Might debuff. For Defense and Speed debuffs I'll just change the color from blue to yellow or red, respectively:

I did make my own VFXs for when I make buffing abilities though:


Fixing Attack Animations Being Forgotten
A problem I had been wrestling with since I started the project is the fact that every time I restart the project, all my attack animation montages would become unassigned from the attack structs. I had thought it had to do with the fact that my attack strings are stored as arrays of custom structs. Turns out I wasn't very far off. There's apparently a rare engine bug that sometimes causes structs to not only lose values and data, but to simply not serialize them in the first place.
After researching the problem for a couple days I eventually stumbled on a forum post that was similar enough to my problem that the solution worked: You have to set the variable to replicate across the network (even if it is a single player game), save, close the project, and then when you re-open you can un-replicate the variable and it saves/serializes properly.
I was elated to finally solve that problem, and so simply too. I was worried I was going to have to completely change the structure of my game.
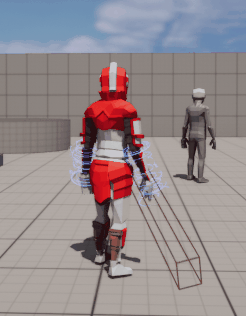
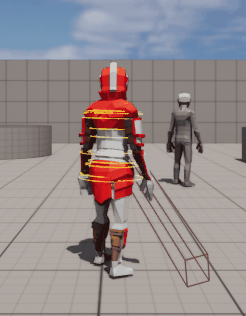
Weapon Effects
The next thing I wanted to work on was the effects on weapons, specifically hit effects and weapon trails. I wound up purchasing the Niagara systems I would use, and one would think that would be the end of it; But, no. It actually never occurred to me to look for guides or tutorials on how to implement these two until now. Either way, I figured it out.
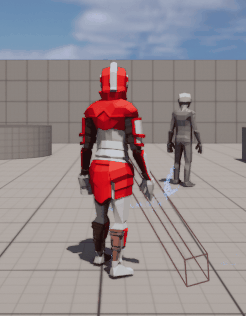
First was weapon trails: In a way purchasing the weapon trails made it a bit easier, I just had to figure out how to activate and deactivate the Niagara emitters according to the position in an animation. I chose to create a new AnimNotifyState (that way I could more easily visualize it on the animation timeline). I used the "Received_NotifyBegin" and "Received_NotifyEnd" to call interface functions on the mesh owner, this way I don't need to cast anything. The interface functions take an enum that denotes what trail I want (un-)active (Right Hand, Left Hand, Right Foot, Left Foot), that way in case I need to have one animation cover multiple hits I can. The characters then had these interface functions defined to call up Niagara Components from a dictionary and turn them on or off. For the basic character this dictionary is defined in editor as the basic character doesn't really use weapons and would instead have weapon trails on their hands and feet (punching, kicking, respectively). But for the player characters that would use weapons (or other characters that I don't have solid plans for) when summoning or dismissing the weapon I just had to add a branch that rewrote the dictionary value for that enum key.

This was fairly easy, it was the hit effects that gave me a bit of trouble though.
The first thing I did was create a "Hit VFX" blueprint that did nothing but hold a reference to a specific Niagara hit effect, and only last for a short while. I did this because I knew I was going to need a bunch of them and didn't want them hanging around clogging up the memory. I'm going to have to look into the ability to object pool and reuse resources like the hit effects eventually so I'm not constantly creating and destroying objects (which can get expensive), but it works for now.
Next I simply spawned the hit effect at the location where the hit occurred. One would think that would be easy, but when I tried it the first time, what I got was the effect would spawn at the center of the sphere trace that hit the enemy so it was noticeably nowhere close. That wouldn't work. While I don't need the effects to be exactly where meshes overlap, having them at least be close and be on the hit mesh is necessary. While I was looking into this I also ran into a problem I partially solved before: because I need to be able to hit multiple meshes with a single sphere trace, this somehow also translates to a single sphere trace being able to hit the same mesh multiple times.
I say "partially solved" because I originally just checked if I had analyzed an overlap hit at all; Now I needed to go back into that algorithm and fine tune it to specifically look for the hit location closest to where the attacking character was attacking from. First, I made an additional interface call to the Attack Controller's owner to pass in the same enum I used for the weapon trails and actually get the trail's origin location (I figured that would serve as the close enough location to get the hit location I wanted). The algorithm then finds the hit location with the shortest distance to the trail location and returns that. And then it loops through those returned hits (1 for each hit enemy) and applies damage and effects. In fact, looking back I could probably make the function more efficient and only go through a foreach loop once instead of twice, but at least the second time is shorter. For now everything is working satisfactorily though.


General Housekeeping on How Attacks Work
The first thing I did was fiddle with the Attack Container component. While it worked well as part of the weapons, I decided to move the container from the weapon to the character as changing weapons between characters isn't a thing in this or really any of my current game ideas. The reason I did so was: this way I don't need to have a whole bunch of weapon child components, and less casting needed when morphing. And by "less" I mean "none", which is always a good thing!
The last thing I did was make knockback and launching be values on individual attacks. I did this so that any attack could have those properties on any character, that way I didn't have to hard code anything, or have every attack have that property. The mechanics of it aren't fully implemented, but I did move the values over so when I'm ready to work on them they will be there.
Doing Some Housekeeping on the Morphing Cinematic
The way I had morphing working before relied on instantiating several dynamic copies of a small number of materials and directly manipulating the variables in them. This was how I had different materials be visible on different sides of moving planes.

However this required multiple instantiations and, like I said, direct variable manipulation which weren't very cost efficient. The original intention behind this was to save just a little bit of work when I moved into production and started making the actual different playable rangers. However, worried that having them all morph at the same time might drop some frames from the instantiating and variable referencing, I decided to transition the morphing to use Material Parameter Collections (MPCs) instead. These allow me to edit variables at run time without making new Dynamic Material references, or trying to get to their variables directly. The downside is that each ranger will need to have their own set of materials referencing their own MPCs. I decided that this would be a fair trade-off as by Sentai convention the team is relatively small anyway; It is the very odd series that has more than six heroes. Using the MPCs also allowed me to discover and use Niagara Parameter Collections (NPCs (not to be confused with Non-Playable Characters)). This means I didn't need direct references to the various Niagara systems that the morphing sequence uses nor do I need to directly manipulate their variables as they are running off of the collections automatically.
The final thing I worked on was some visual bugs that had either slipped my notice or come up as a result of my fiddling in the Long Morph sequence. Specifically the helmet not fully appearing and the arms being partially morphed midway through as a result of some plane placements.


The arms just required that I move the transition planes during the sequence where they cross over the body, so that was fairly straightforward.
For the helmet I had originally used a plane as well, but that was causing the arms to, once again, prematurely transition materials when they went above the neck. So I had to go back and implement a box, including not only its position but its dimensions and direction as well.
Sure, I could have tried coming up with yet another animation, but one needs to draw the line in the sand somewhere and I wasn't feeling super animation-creative at the time.
And...I believe I'm finally caught back up! Yay!


Comments